


Can I Install Central Air Myself? (Find Out Now!)
Central air is one of the most essential components of a clean and comfortable home. While it’s still viewed as a commodity, installing a central air conditioning system in new homes is pretty standard. However, if you have an older home and want to install one, this can prove to be difficult on your own.
It’s possible to install a central air yourself, but it’s challenging without the proper tools, training, and experience. Central air involves many different components such as ductwork, an indoor coil, and an outdoor condenser. A combination of physical labor and precise science goes into installing central air.
Unless you have previous air conditioning or HVAC experience, I would highly recommend attempting to install your central air. If, however, you’re hard-working and innovative and want to save money, this article will explain how to install central air.
Don't want to do it yourself?
Get free, zero-commitment quotes from pro contractors near you.

Make Sure You Have the Right Tools
Before getting started with your installation, it’s a good idea to ensure that you have all the tools you’ll need.
- Tinsnips
- Electrical tape or zip ties
- Hangers or J-Hooks
- Vacuum Pump
- Air Conditioning gauges
- Wire Strippers
- Basic Handtools
- A brazing kit
- Hydrogen tank
Calculate to Make so That Your AC is the Right Size
Whether you’re buying a new or used AC, you’ll want to make sure that it’s the right size for your home. Having one that’s too big will cool your house so fast that it doesn’t remove the humidity. However, having an air conditioner that’s too small will constantly run and result in a high energy bill.
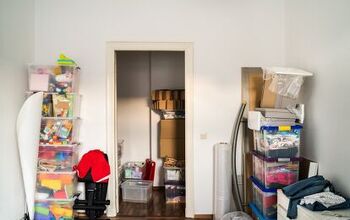
If You Don’t Have Ductwork, You’ll Need to Install Some.
The only way a central air works is if you have ductwork inside your home. If you already have a furnace that blows air through registers to warm your house up, then you have ductwork. If you don’t have a furnace or ductwork, however, you’ll need to install both of those as well.
How to Install a Central AC Yourself
Once you have your tools gathered up and an air conditioner that’s the right size, it’s time to start your installation.
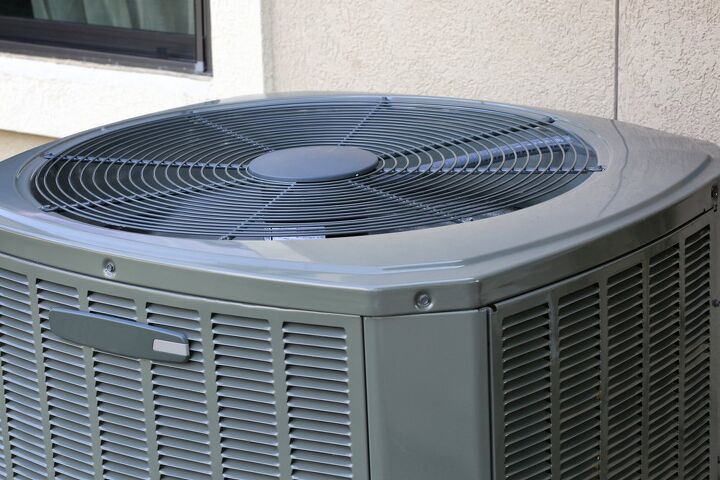
Select a Location for the Outside AC
The first thing you’ll need to do is pick a good spot outside your home for your air conditioner. Ideally, you want a flat area close to the house where there aren’t a lot of trees or shrubs. Debris and branches can get into the air conditioner and damage it.
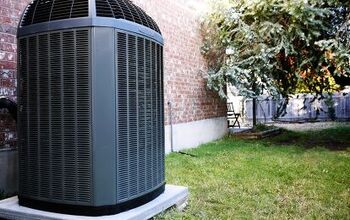
Once you’ve picked the right spot, you’ll need to lay an air conditioning slab or pad on the ground. The AC will then sit on top of this, so you must find a sturdy, flat area to set your pad. Make sure that you pack the dirt down beneath the pad because the weight of the air conditioner could cause the ground to shift beneath the pad.
Set the AC on Top of a Pad
Once you have your pad firmly situated on the ground, you should set your air conditioner on top of it. Most air conditioners weigh between 150 and 250 pounds, so you’ll likely need some help with this part.
Install the A-coil on Top of the Furnace
Inside your home, you’ll have to install an A-coil on top of your furnace. Many people don’t realize that there are indoor and outdoor components with central air. There are then several refrigeration lines or pipes that connect the two sections. Installing the coil on top of the furnace is pretty tricky, so brace yourself.
You’ll have a section of metal ductwork known as a plenum that’s connected to the top of the furnace. The goal is to insert the coil neatly in between the metal plenum and the furnace. To do that, you’ll need to cut the section of metal out of the way, matching the exact dimensions of the coil. It’s a good idea to get a coil that’s the same width and depth as your furnace and plenum so that the coil fits neatly in between both.
Cut a Hole for the Lineset and Wires
Next, cut or drill a hole in your wall that’s large enough to fit two electrical wires and your refrigeration lines through. This hole will give your liquid and suction lines the ability to travel from the A-coil to the air conditioner. It will also allow room for your high-voltage electrical wire and your low-voltage thermostat wire to travel through. Both of these will connect from the air conditioner to either the furnace or your main panel box inside the house.
Connect Your Liquid and Suction Line Sets
With your hole cut, you can now connect your two refrigeration lines from your air conditioner to the coil. Depending on how big your air conditioner is, one of your lines will be from 3/4″ to 7/8″ inches in diameter. The other will almost always be 1/4″ in diameter. Connect these pipes to the appropriate spots on your coil and air conditioner.
Don’t Forget Your Filter if Necessary.
If necessary, you’ll also need to install a filter inside your home on the 1/4″ liquid line. There should be an arrow on the filter pointing towards the furnace to be properly installed. Some air conditioners have a filter preinstalled on them, so make sure to check with your specific manufacturer.
Braze Your Connections
With your liquid and suction lines running from the air conditioner to the coil, it’s time to braze them together to form an airtight seal. You need to braze instead of crimp or solder the lines because of the amount of pressure inside of them. A solder or crimp joint isn’t strong enough to withstand the pressure, and you’ll have to use brazing material.
Brazing is very similar to welding, and if you know how to weld or solder, you likely know how to braze. Don’t try to braze your central air if you don’t have any previous experience. Brazing involves the use of oxygen and acetylene, which produces incredible heat. They’re a fire and explosion hazard if you don’t know what you’re doing.
At any rate, either you or a helper will need to braze the joints together to continue.
Perform and Air Test
Once your liquid and suction line joints are brazed to both the air conditioner and the coil, you’ll want to conduct an air test. Air tests are done to ensure that your braze is airtight and that there isn’t a leak anywhere. For inexperienced brazers, there’s almost always at least one leak when you braze.
You’ll need air conditioning gauges and a nitrogen tank to perform the air test. Connect one end of the hose to the nitrogen tank and the other end to one of the air conditioners’ ports near the liquid and suction line. Blow nitrogen into the air conditioning lines and check your gauge to ensure there aren’t any leaks. There’s enough pressure in the lines from the nitrogen that you can usually hear air hissing if there’s a leak.
Vacuum Down Your AC System
If the air test checks out, it’s time to vacuum or pump down the system. To do this, you’ll need a vacuum pump and your air conditioning hoses, as well as a micron gauge. This is another part that’s extremely difficult to do without experience, and I would recommend against it.
The goal is to get your micron reading below 400 and keep it there. If the number sits at 400 or less but starts shooting up into the thousands, there’s a good chance that you have a leak somewhere in the system. This means that you’ll have to start over with your air test and brazing procedures until the leak is found and fixed.
Run Your Low-Voltage and High-Voltage Wires
In order for your air conditioner to operate, you will have a low-voltage thermostat wire running from the air conditioner to the furnace. You’ll also have an electrical wire running from the air conditioner to your main breaker panel. Make sure that you consult the ID labels on your air conditioner to ensure that your wires are the right size and that you connect them to the right places. Incorrect connections will lead to mechanical failure, and your air conditioner won’t start.
Additionally, it’s always advisable that you install a disconnect switch between your air conditioner and your panel box. Essentially, you’ll have an electrical wire running from the panel box to the disconnect, which should be attached to the outside wall next to the air conditioner. You’ll then have a second electrical wire running from the disconnect to the air conditioner. The disconnect acts as an emergency shut-off and a service shut-off.
Release the Freon in the AC
The final step is to use a set of Allen wrenches to open the ports on your air conditioner and release the freon that comes preinstalled on them. To do this, you’ll need to remove the brass caps that are protecting them and have Allen wrenches the right size. Insert the wrench into the two ports, one at a time, and turn counter-clockwise so that the ports open. You should hear a sudden hiss as the freon escapes the air conditioner and races through the refrigeration lines.
Perform a Test Run
Once this step is done, it’s time to turn on the power and perform a practice run. Flip the circuit breaker that you installed for your air conditioner in the panel box to the ON position. Make sure the disconnect switch is properly inserted or flipped to the ON position as well. Check your thermostat and change the setting to COOL, and turn the temperature down to below what the room temperature is. This should start your central air.
How Much Does It Cost to Install a Central Air?
Central ACs are fairly expensive, especially if you get someone to install them for you. You can spend anywhere from $2,000 to $4,000 for the AC, the A-coil, and the materials alone. Installation costs are usually another $1,000, but they’re always necessary due to the difficulty of installing an air conditioner.
Related Questions
Is it wise to install my own central AC?
No, in the long run, and the short run, it isn’t a good idea to install your own central AC. There’s about a 0% chance that you’ll do everything correctly without the proper training and tools. An improperly installed air conditioner will last only a fraction as long as a professionally installed one.
How long should a central AC last?
The average lifespan of a quality air conditioner is anywhere from 15 to 30 years. Cheaper and lower-quality central ACs will only last 8 to 15 years, but they can last much longer with proper care and maintenance. An improperly installed air conditioner can give out as early as three months to several years.
Don't want to do it yourself?
Get free, zero-commitment quotes from pro contractors near you.
Final Thoughts
Central air conditioners improve the quality of your home as well as its value. Hiring a professional to properly install one will cost you more money upfront, but it’s a good idea in the long run. Your AC will run more efficiently and last much longer while having fewer issues.

Before I started writing, I worked for 6 plus years in the plumbing, electrical, and HVAC business. I was primarily an HVAC installer but also worked as a plumber and electrician. Now I'm a copywriter, focusing on home improvement content and guides.
More by Jalin Coblentz


![10 Best Electric Pressure Washers – [2022 Reviews & Guide]](https://cdn-fastly.upgradedhome.com/media/2023/07/31/9070600/10-best-electric-pressure-washers-2022-reviews-guide.jpg?size=350x220)


