How To Fix Cracks In Windows

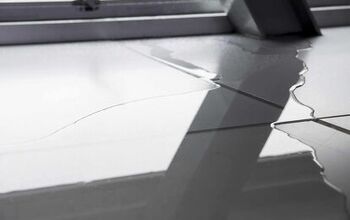
Window glass is usually pretty durable, but it only takes one unfortunate event to cause a crack.
Whether severe weather hits your windows, or a beloved pet jumps up without knowing its own strength, accidents are bound to happen eventually. But when you have a cracked window, you might wonder what steps you should take to prevent the crack from spreading, and how to fix window cracks in general.
To fix cracks in windows, you can use a two-part epoxy to seal the crack. You can also try using a clear nail polish, or even tape to seal the window crack if you need a quick fix.
For a permanent solution, you should replace the window with new glass, or try Plexiglass or a more durable material if you find the area is prone to frequent damage.
There is more than one way to fix the cracks in your window. In the end it depends whether you are just looking to seal the crack, or if you want the crack to disappear altogether.
Most repair methods are fairly simple, and depending on the window in question, you might even be able to easily replace the window pane yourself as well. Read through our five window crack repair methods to find which one is best for you.
Five Methods To Fix Windows (With Step-By-Step Guide)
Method One: Seal The Crack With Epoxy
One great way to fix the crack in your window is by using a two-part epoxy. The reason this method is so popular is because it is long-lasting and highly effective.
In some cases, if it is applied properly to a less-severe crack, it can almost completely erase the appearance of the crack.
This means it can not only stop the spreading of the crack, but almost make the crack completely disappear. Best of all, it is a fraction of the cost of replacing a window.
While it is a bit easier than replacing your window, the are still several steps involved to ensure this process is done properly. You should follow all these steps for best results.
Step One: Clean And Dry Window Surface
Use a window cleaner or alcohol to clean the window area. You don’t want to mix in any dirt to the epoxy, as this will only make the crack and repair more noticeable to the naked eye.
Make sure you are very gentle when cleaning. Apply minimal pressure the entire time, as any pressure is likely to make the crack expand, and might even cause the window to break in some cases.
Step Two: Prepare The Epoxy
Follow the instructions on your two-part epoxy (hardener and resin) mix. Apply the mix to a disposable plate or some other disposable surface. Mix thoroughly and prepare for the next step.
Step Three: Apply Epoxy To Affected Area
Use a putty knife or similar tool to apply epoxy to the crack area. Be careful to apply the epoxy only to the affected area.
Make sure the epoxy soaks into the crack, ensuring it will seal. Make sure you are mindful of time, as epoxy dries fast.
Pro Tip: Epoxy hardens quickly, often within 10 minutes. So, make sure as soon as you mix the epoxy you have all your materials ready, as you will only have a few minutes to apply the product before it’s too late to sink in through the cracks.
Step Four: Shave Off The Excess
Once the epoxy has dried completely, you can get rid of the extra epoxy that is left on top of the glass. Use a razor blade tool to carefully scrape off the access.
Go in at a 45-degree angle or so. Be careful not to scratch the glass in the process of removing the extra epoxy.
Step Five: Clean, Inspect And Repeat As Necessary
Once you remove the extra epoxy, clean the window again. Once the window is cleaned and shiny, you should be able to get a good look at the window.
Make sure it looks sealed and there is no extra epoxy. Apply another round of epoxy if the area has not absorbed enough to seal the cracked area.
Method Two: Replace Cracked Window With New Glass
If the glass in question is highly visible to you and guests alike, you might want to make sure the area remains crack-free. If this is the case, you might need to replace the cracked glass with a new pane of glass.
The type of windows you have will dictate exactly how you need to proceed with replacing the cracked glass. First, you should check to see if your windows are under warranty.
If they are quality and newer windows, there is a good chance there might be some warranty and insurance coverage that can assist.
Also, check your home insurance. If the cracks were caused by severe weather (including a hurricane), then they might be covered by insurance.
Make the necessary calls before heading to the home improvement store. This can save you money, and you might get a brand new window out of it.
Otherwise, follow the proper steps to replace the window pane, starting by purchasing the correct materials and having glass cut.
Method Three: Swap Out Glass With More Durable Material
Before you head to the home improvement store to buy another panel of glass, consider how often your window has cracked, or how many times you can see yourself needing to make this same repair.
If you can see your dog busting the window again, or have lots of pebbles mixed into your lawn, and know it is only a matter of time before the mower hits another one and it hits the house, maybe you should think beyond glass.
Consider purchasing a more durable see-through material like acrylic sheets, with Plexiglass being the most popular option. This is a great way to properly fix the crack in your glass and ensure that there are no cracks in the future.
If you are replacing glass in a basement window, acrylic sheets are a great option, as it is unlikely anyone will get up close to the window and even notice it isn’t glass.
Method Four: Use Clear Nail Polish For A Quick Fix
Applying a two-part epoxy is not the only way to stop the spread of a window crack. In fact, you might even have a solution in your home already: clear nail polish.
That’s right, not only is clear nail polish great to add a protective after-coat to your nails, but it can also help seal a window crack and prevent it from spreading.
The method using nail polish is similar to using epoxy, but a bit less complicated. This also means, however, that nail polish is also not as effective as epoxy. But in a pinch, it is a simple option that can help fix a crack quickly.
Step One: Clean The Window
Just as with the epoxy method, be careful when you clean the window. Make sure you apply minimal pressure. Window cleaner or alcohol and microfiber cloth work well.
Step Two: Apply Coat Of Clear Nail Polish
Use the nail polish brush to carefully apply a coat of clear nail polish. Try not to apply too much at once, as this may cause polish to drip down the window and cause a mess.
Step Three: Inspect, Repeat As Necessary
Once the polish is dry, check the results. Is the crack sealed? If so, you can move on to the next step. If not, apply a second coat, and continue until dry.
Step Four: Scrape Off Excess Polish
Use a razor blade to remove any extra nail polish. Then clean the window to make sure the seal is complete and the excess polish is gone.
Method Five: Tape The Crack For A Temporary Solution
If you are looking for an immediate and temporary solution, you can opt for some adhesive tape. Ideally, you should select a clear adhesive packing tape.
This will ensure you can at least still properly see out of the window. It will also make it possible for you to see if the problem worsens.
Tape should not be the permanent solution. It does very little to properly seal a crack. This also means that the crack will likely expand and worsen over time.
But if you want to make sure no one gets cut, or make sure rain or weather does not sneak into your home, tape is a good quick fix.
It is essentially a “band aid” solution. But once you apply the tape, you should consider one of the other methods we provided in order to have a more permanent solution.
Wrapping Up How To Fix Cracks In Windows
If you notice a crack in your window, you should address the issue right away. One great and popular way to fix a window crack is by using a two-part epoxy to seal the crack.
You can also replace the window with a more durable material like acrylic sheets. If you are in a pinch and need a quick fix, you can use clear nail polish, or even adhesive clear tape for a temporary fix.
Related Guides:
Tom Gaffey is an expert writer who currently resides in Washington D.C. Tom has a passion for real estate and home improvement writing, as well as travel and lifestyle writing. He lived the last twelve years in Hawaii where he worked closely with luxury resorts and event planners, mastering his knowledge of aesthetics and luxury products. This is where he found his passion for home improvement and a keen interest in DIY projects. Currently, Tom resides in Washington D.C, and also working on his debut fiction novel.
More by Tom Gaffey