


How To Install A Shower Stall In A Mobile Home (Do This!)
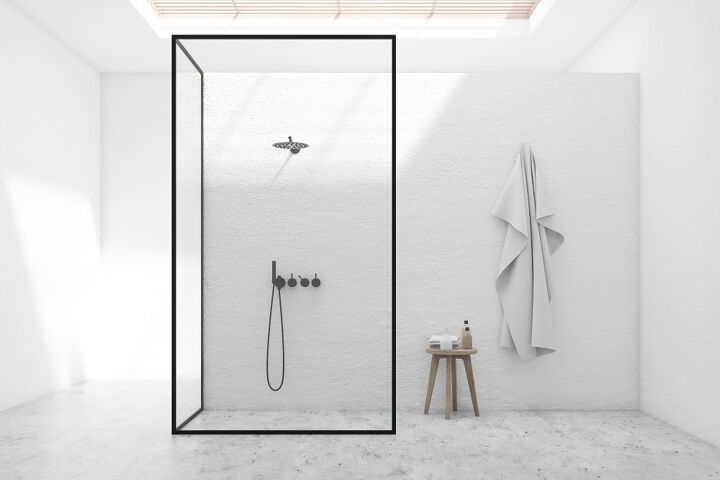
Bathroom remodels are one of the most popular projects for many homeowners. Remodeling a bathroom in your mobile home can present some special challenges. A popular and often necessary upgrade in a mobile home is replacing a shower stall or shower pan in a bathroom.
Replacing a shower stall or shower pan in a mobile home bathroom requires some preparation and planning. Any damaged flooring or plumbing must be repaired or replaced before the installation. You must install the shower pan plumb and level to ensure proper drainage. Lastly, the entire assembly must be properly caulked and sealed to prevent water damage.
Installing a new shower stall or shower pan is not a job beyond the capabilities of most homeowners. If done systematically and carefully, the installation will go smoothly. Some understanding of basic carpentry and plumbing is helpful, as is having the right tools. A few step-by-step instructions can help you on your way.
Do You Need Tub Liner or Shower Surround Installation or Replacement?
Get free, zero-commitment quotes from pro contractors near you.

Getting the Water Running Again
To get the shower in your mobile home operating again takes some planning, some preparation, and a little work. The key to a successful shower stall installation is working systematically. To help you have a successful project, here are some step-by-step instructions to assist you along the way.
Step 1: The Tear Out
Before any installation can begin, you must prepare the area. This preparation requires the removal of the old shower stall or shower pan. Work carefully, especially around any plumbing connections.
Step 2: Make Any Necessary Repairs
Often, a leaking or damaged shower pan or shower stall will damage your bathroom’s subflooring or walls. Before putting anything back, repair any damage to these areas.
Step 3: Gather Your Materials and Tools
It is always better to have all your materials and tools gathered before you start a project. Having everything on hand can ease frustrations and make the project go faster. If everything is on hand, you will have fewer interruptions and delays. We suggest that you have the following ready to install your new shower stall or shower pan.
- Your new shower stall or shower pan with the installation instructions
- A cordless power drill and drill bits
- A caulking gun and silicone tub and tile caulk
- Your tape measure
- A Framing Square
- A carpenter level
- Screwdrivers of both kinds
- A carpenter hammer
- Pliers
- Extra framing and finish screws
- Wooden shims
- Masking tape
- A pencil or other marking tool
Step 4: Read the Instructions
Before you go any further, take a few moments to review the manufacturer’s installation instructions. Make sure you understand the requirements exactly. Follow these instructions exactly to ensure that the warranty on your new shower stall or shower pan remains in effect.
Step 5: Test the Fit
Before you cut anything or attach anything, make sure everything fits and lines up correctly. These connections include the drain, the water connections, and the showerhead. The drain is of particular importance.
If the drain doesn’t line up with the shower pan’s opening, you must move the drain line and replace the subflooring. In most instances, this is a job best left to a professional licensed plumber.
Step 6: Set the Shower Pan
When you are sure that everything lines up properly, you can set the shower pan in place. Follow the manufacturer’s instructions to properly attach the drain line to the opening in the shower pan.
Use your carpenters level to make sure that the shower pan is level. If the shower pan is not level, the shower will not drain properly. You may find that you have standing water in your shower. Use the wooden shims to level the shower pan.
Follow the manufacturer’s instructions on attaching the shower pan to the subflooring. Attaching the shower pan involves using special clips supplied with the shower pan or using screws around the shower pan’s perimeter.
Step 7: Caulk and Seal
When you are satisfied with the installation of the shower pan, caulk, and seal everything. Pay particular attention to any holes or openings in the shower pan along the edges. Caulk or seal the screw heads that attach the shower pan to the stubs and subfloor. Caulk the edge of the shower pan where it meets the subfloor of your mobile home.
Step 8: Prepare the Shower Surround Area
Once the shower pan is in place, you can turn your attention to the surround for your new shower. Most mobile homeowners opt to install a shower surround kit. Before you go further with your project, consult the manufacturer’s instructions. You should follow these instructions exactly when installing the surround.
Some surrounds are installed directly to the studs. Other styles of shower enclosures require backing of some sort. The manufacturer’s installation instructions will give detailed information about how to prepare the walls of your bathroom for your new shower surround.
Step 9: Making the Openings for The Fixtures
Installing a plastic or fiberglass shower surround often requires you to make the openings in the surround for the plumbing. These openings usually involve the control valve and the showerhead opening.
Measure carefully. A mistake now could ruin your new shower surround. The installation instructions that came with your surround should offer suggestions or instructions on the best method for making measurements. Double-check your measurements to ensure precise placement.
Step 10: Make the Cuts
In most instances, the best tool for making the plumbing openings in your new shower surround is a carbide blade hole saw. You can purchase the exact size of hole saw needed at your local hardware or home improvement center.
The holes needed depend on the size and type of fixture you intend to install and the pipes coming through the walls. Don’t make the mistake of cutting your holes so tight that you have trouble fitting the pipes through the holes. Make the holes large enough to give yourself some wiggle room.
Step 11: Test the Fit
Before you begin to install anything or attach the surround, test the fit of all the pieces. Ensure that the holes for the plumbing line up and allow the other pieces of the surround to connect properly. Once you are confident that everything fits, remove the parts of the surround, and set them aside.
Step 12: Attach the Surround Parts
The installation instructions that came from the manufacturer may detail how to assemble the parts of your shower surround. The order is important to ensure a watertight seal along any joints if your surround comes in multiple parts.
Most fiberglass shower surrounds are glued to the studs or wallboard using construction adhesive. Read and follow the directions on the adhesive to ensure a good bond. Pay particular attention to temperature requirements.
Step 13: Install the Fixtures
When you have the surround in place, it is time to install your new shower fixtures. Some people may prefer to have their plumber come in and put the new fixtures in place. However, new fixture designs allow for easy homeowner installation.
As always, follow the directions that come with the fixtures. Be sure to test fit everything before making the final assembly.
Step 14: Caulk and Seal
With everything else done, caulk and seal all the edges of your new tub surround where they meet the old wall finishes. It is important to seal these outside edges to keep any water from invading the space behind the shower surround. Water in these areas can cause considerable damage over time.
Fiberglass or Plastic?
Both styles and materials used to manufacture shower surrounds have advantages and disadvantages. Before deciding on which material to purchase for your mobile home bathroom remodel, consider the following information.
Price
Acrylic shower surrounds are usually more expensive than fiberglass. Depending on your uses, your plans, and your budget, the price can be a huge determining factor in this choice.
Materials
Acrylic shower surrounds are made by vacuum stretching large sheets of heated acrylic in molds. Usually, acrylic surrounds are reinforced with glass fibers and resin after the acrylic sheets get formed.
Fiberglass surrounds are built up using polyester resins and glass fiber mixtures applied to a mold. The color and finish application are put into the mold first, and then the subsequent layers are built up over time.
Durability
Fiberglass and acrylic are easy to clean and maintain. You should never use harsh chemicals or abrasive cleaners on an acrylic or fiberglass surface. Typically, acrylic is less prone to stains. Fiberglass may lose some of its luster due to cleaning and maintenance. Fiberglass tends to be more porous than acrylic and may stain as it ages.
Do You Need Tub Liner or Shower Surround Installation or Replacement?
Get free, zero-commitment quotes from pro contractors near you.
Creating that Ideal Space – Bathroom Remodels
Remodeling a bathroom is one of the easiest ways to add value to your mobile home. A new shower can make your bathroom more inviting and more relaxing. Remodeling a shower enclosure is not out of the range of most homeowners.
We hope that this article has provided you with the information and knowledge you need to upgrade the shower in your mobile home. Good luck and have fun with your projects.

Dennis is a retired firefighter with an extensive background in construction, home improvement, and remodeling. He worked in the trades part-time while serving as an active firefighter. On his retirement, he started a remodeling and home repair business, which he ran for several years.
More by Dennis Howard


![Cost To Drill A Well [Pricing Per Foot & Cost By State]](https://cdn-fastly.upgradedhome.com/media/2023/07/31/9074980/cost-to-drill-a-well-pricing-per-foot-cost-by-state.jpg?size=350x220)


![10 Most Dangerous Neighborhoods in Baltimore [Updated]](https://cdn-fastly.upgradedhome.com/media/2023/07/31/9075655/10-most-dangerous-neighborhoods-in-baltimore-updated.jpg?size=350x220)


