How To Organize A Deep Pantry
Wouldn’t it be great to save time, energy, and money every time you use your kitchen? Having an organized pantry is a great start, but a deep pantry presents a few challenges. Knowing how to organize a deep pantry can streamline your meal-prepping, reduce stress, and make your kitchen tidier.
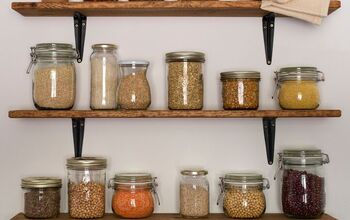
Using the right organizational supplies is critical when organizing a deep pantry. Things like slide-outs, stacking drawers, and lazy Susans keep things visible and accessible. Store larger items toward the back and keep products nearing expiration at the front. Sorting similar items into containers you can remove, like baskets or bins, helps corral multiple items.
Before you let a disorganized pantry drive you to order take-out yet again, keep reading. These tips for organizing a deep pantry will help you regain control of your kitchen. Plus, they’ll save you precious time and money in the process.
Eight Easy Steps For Organizing A Deep Pantry
Organizing a deep pantry comes with a few extra considerations (although perhaps not as many as organizing a corner pantry). When you’re dealing with deep shelves, it becomes easier to forget about items that get shoved to the back. Things pile up in front of other items, and soon you don’t know what you have.
When this happens, products are much more likely to expire and get forgotten, which means you waste food and money. Deep shelves also make accessing your stuff more difficult if it’s not organized well.
Luckily, organizing your pantry doesn’t have to be overly time-consuming or difficult. It just takes a bit of effort and commitment. Of course, you can always call a professional organizer if you think you need a helping hand. But these steps will help you break down the process so you can tackle it in a manageable way.
1. Take Everything Out Of Your Pantry
It’s tempting to cut corners by organizing and purging items around the clutter. But ultimately, this method takes longer and is not the most efficient use of your time. Your best first step is to take every single thing out of your pantry.
Don’t even leave so much as one box of cereal in there. Not only does removing everything give you a clearer picture of what you have, but it also provides you with a clean slate. An empty pantry shows you the precise space you must work with and makes it easy to get measurements for potential storage.
Removing everything from your pantry is also an excellent opportunity to give the shelves a thorough wipe-down. So, clean off a nearby flat surface like your kitchen table or island, and get to work.
2. Get Rid Of The Things You Don’t Need
Once you have everything out, you can start paring down all of your pantry clutter. Start easy by tossing anything that’s expired, spoiled, or damaged.
Next, check out any non-food items you store in your pantry. For example, you might keep small appliances in there, various food storage containers, or spare grocery bags. You also might have several storage containers that you’re using (or not using).
Decide which of these things you actually need and use. Anything that doesn’t check off those boxes, donate or toss it. Another option is to sell it, but only if you really plan to do so within the next few days.
You can place the storage containers to the side for now. You might end up deciding to use them in your finished pantry. But until you know exactly how your new setup will look like, pretend they don’t exist.
3. Categorize Your Pantry Products
After reducing your inventory, you can start organizing. Categorize your products in a way that makes sense to you. For example, put your snack items together, cereal and breakfast bars in another pile, and canned goods in another.
If you’re more detail-oriented, you can even create smaller categories. In other words, instead of just snacks, you might prefer to divide these larger categories into smaller ones. Therefore, you might have snack bars, chips, fruit pouches, etc.
How you decide to create your categories is entirely up to you. The important thing is that you put similar items together. Then, you can clearly see how much you have in each area.
4. Plan Your Pantry Layout
Once you know the rough size of each category, you can start planning your new layout. Create zones in your pantry to store similar items together. For things you access regularly, make sure to put them in a place within easy reach.
For snacks you don’t want your kids grabbing all the time, store those on a higher shelf. (You might want to keep the kids’ healthier snacks within their reach so they’re more likely to grab those first).
Consider your pantry dimensions when planning your layout. Use a tape measure to get accurate numbers for your shelf heights, lengths, depths, etc. Make a note of these for future reference.
5. Choose The Right Organizational Tools
After knowing what you have and where you want to put it, you can decide what type of storage you need. You can check that pile of storage containers you set aside earlier. But if it doesn’t have what you need, donate them and start fresh. Don’t force yourself to organize your pantry around the storage you already have.
Some great storage ideas for a deep pantry are slide-out drawers and shelves, clear stacking drawers, and lazy Susans. Lazy Susans with divided compartments and raised edges are great for keeping bottles from toppling over when they spin.
Consider installing half shelves along the pantry wall if you have a category with smaller and larger items. You can keep smaller items on these shelves, and the more oversized items below.
Another easy and simple storage idea in a deep pantry is to use large baskets or bins. You can store things like snack packs, bags of chips, etc. When looking for one of these items, you simply pull out the whole bin.
Grab what you need, and replace the container on the shelf. This is an excellent alternative to individual bags falling everywhere and getting lost in the back of your pantry. (Make sure to consult your measurements to get appropriately sized containers.)
6. Don’t Forget The Floor And Door
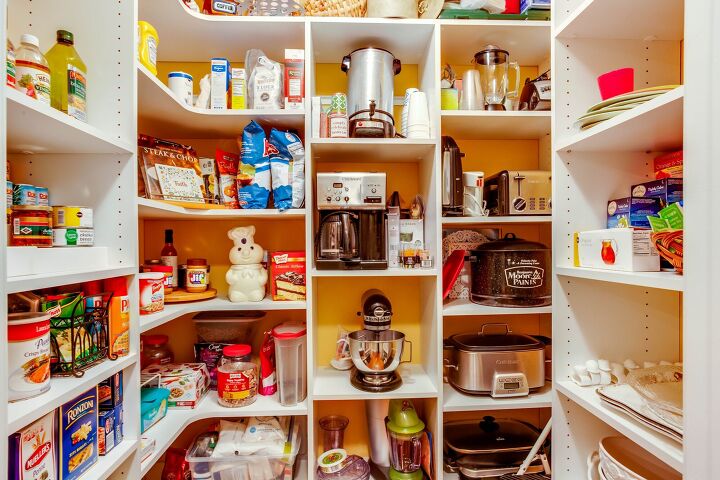
Don’t forget the inside of your pantry door. There are excellent over-the-door shelves that you can use to maximize your storage. You can also find styles that mount to the door. Small appliances can live on a slide-out shelf, making them easier to access.
Or, if you have room on the pantry floor, consider storing appliances on small, rolling plant stands. This hack makes it super easy to roll out what you need from the back of the pantry.
7. Put Items Back In The Right Order
After positioning all of your containers where you want them, put food back in a way that makes sense. Larger items are behind smaller ones. Food that’s expiring soon should be in the front.
Items you use every day should be front-and-center on a reachable shelf. Things you don’t use as often can go higher up in the pantry.
8. Label Everything
Finally, label everything. It makes finding what you are looking for and putting things away easier. It also helps others find items, and it looks good, too.
Enjoy Your Organized Pantry!
Organizing your deep pantry will leave you feeling calmer and refreshed. It’s so nice when you can grab a quick snack without a mountain of chip bags falling everywhere. It also makes meal prep faster when you can grab what you need in moments.
Start by taking everything out, tossing what you don’t need, then get the proper storage for your organizing plan. Slide-outs, stacking drawers, lazy Susans, and baskets work wonders in a deep pantry. Plus, you can maximize your space by utilizing storage on the back of the pantry door and the pantry floor.
Put everything back in zones with similar items, label everything, and smile. Your newly organized pantry is complete, and you can enjoy more free time (and more money in your wallet).
Related Guides:

Stacy Randall is a wife, mother, and freelance writer from NOLA that has always had a love for DIY projects, home organization, and making spaces beautiful. Together with her husband, she has been spending the last several years lovingly renovating her grandparent's former home, making it their own and learning a lot about life along the way.
More by Stacy Randall