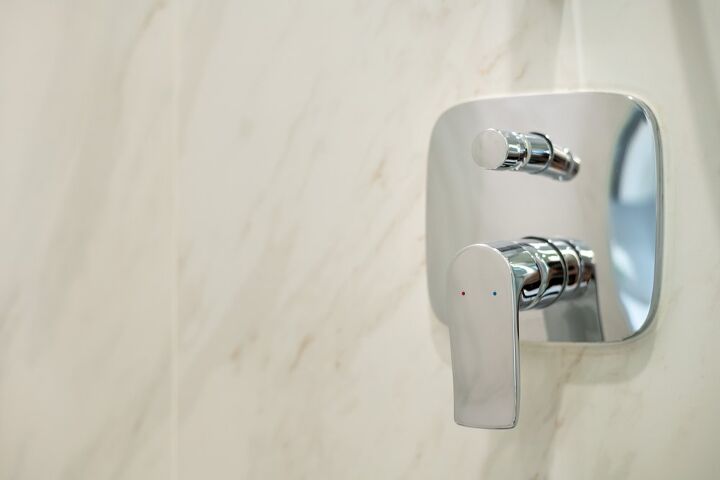
How To Replace A Two-Handle Shower Valve
Let’s say that you noticed your shower acting wonky. It’s drippy, not running well…and it’s becoming a significant pain. The chances are that you’re going to have to replace the shower valve. If you have a two-handle shower valve, hiring a handyman to replace it might cost as much as $600.
To replace a two-handle shower valve, begin by shutting off the water supply. Next, remove the handles and stems before removing the old valve. Install the new valve and properly connect the lines to the hot and cold water as well as the shower lines. Finish by wrapping Teflon tape around the couplings and adapter.
We’ve created this guide for you to follow, so that you can easily remove and replace the two-handle shower valve yourself. That way, you don’t have to spend the money for labor to get a contractor in to help you, as this is DIY friendly project.
Do You Need a Faucet, Fixture, or Pipe Repair or Replacement?
Get free, zero-commitment quotes from pro contractors near you.

Replacing Your Two-Handle Shower Valve Is DIY Friendly
Chances are, you don’t want to have to shell out the cash to hire a professional to replace your shower valve. Believe it or not, replacing a two-handle shower valve isn’t that hard. So, if you want to, you can do it yourself. You only need to ensure that you have tools necessary to do the job, and of course, the replacement valves.
If you are new to the DIY world, this is the perfect job to start with. However, it would be a good idea to invite a friend over who has more DIY experience to help you. That way, they can guide you and teach you as you go.
How Long Does Replacing A Shower Valve Take?
Most professionals can do this in under an hour. For a newbie with DIY experience, you should expect it to take around an hour and a half to two hours.
Replacing Your Two-Hand Shower Valve Is Simple
For the most part, this isn’t a hard DIY job to do. However, it is tedious and detail-oriented. It also can require a decent amount of strength. That’s why a lot of people prefer to have it done professionally. If strength is not your specialty, there’s no need to worry. You can ask a friend or a neighbor for assistance. Paying someone $10 to remove something for you is better than paying $300 in labor fees!
How To Replace Your Shower Valve
Now that you have a good idea of what to expect in terms of time and effort let’s get to the real meat of the article and talk about the steps you’ll have to take.
Tools You Will Need
Before you can replace anything, you’re going to need to get the right kind of shower valve, as well as the supplies you need. We suggest choosing a shower valve that has the same type of setup as your current one.
Along with your valve, you’ll need the following:
- A jigsaw
- A soldering torch
- Pipe fittings
- A conversion plate
- Teflon tape
- Slip-joint pliers
- A 4-in-1 screwdriver
- An adjustable wrench
If you do not acquire the correct tools, then this project will be nearly impossible. If you don’t have the right tools for this job, perhaps investing in them would be a good idea. Afterall, you will need them for other projects as well. Home improvement stores also have power tools you can rent if you don’t want to purchase them.
Step 1: Shut Off Your Water
Now that you’ve got the supplies in hand, you will need to shut off your water supply to the shower. You can do this by flipping the switch on the water line that leads to the shower. To keep your water pressure steady, turn on the water in your sink and just let it run.
If this is too hard, you can also shut the main water line off. If you do this, you should plan it when no one else is home, or at least forewarn them that the water will not be available for an hour or so.
Step 2: Remove Your Shower Handles And Stems
Here’s where you are going to have to put in some work. You will need to remove the shower handle covers. Most people can use a screwdriver, an Allen key, or an adjustable wrench. Place this equipment in a box for safekeeping.
Next, turn your attention to the shower stems using your screwdriver or wrench. Most stems are screw-shaped, so you can unscrew them. Put these items in the box, too, since you’ll need them later.
Step 3: Remove The Old Shower Valve
You will need to set up your valve the same way you found it, so take a photo of your old valve before you start working on it. This can be done with your cellphone if you want to make things quick.
Now, let’s get to work! If you can’t get your hands in the valve area, you might need to widen the hole in your wall for this using your jigsaw. Detach the valve from the lines to the hot and cold water, as well as the line to your showerhead if you have one. The hole should be at least 12 inches long to access your valve.
Once you remove it, keep the fittings in your safekeeping box since you’ll need them. If you’re worried about screws falling down the drain, it’s a good idea to plug your drain to keep this from happening in case you spill the box.
Step 4: Install The New Shower Valve
Now it’s time to install your new valve! Now is also a good time to take a break since you’ve hit the halfway point. So if you feel tired or sore, take a 15 minute break before getting back to work.
Grab your new shower valve and install it in your shower. Connect the lines to the hot and cold water, as well as the shower line. When you’re connecting everything, make sure it is installed the exact same way as your prior shower valve was. To make sure everything goes well, use the fittings from your old valve, and double-check your installation against the photo you took. Then, wrap Teflon tape around the couplings and adapters.
Important Note
It’s important to align everything in their corresponding directions. For example, your left vent should be connected with your left water pipes, while your right vent should be linked to your right piping. Use female threaded couplings and adapters to link it all up. Make sure that the valve in question is affixed in the same position as your last valve. Once you’ve done that, replace the stems, the shower handles, the conversion plate, and all the other fittings that you have.
Step 5: Turn The Water Back On
Once the valve is replaced, you can turn on the water again. If you had to remove part of your shower wall to get to the valve, you might need to replace the tiling. (But, that’s a separate article!) After that, clean up any dust and debris that you have in your bathroom from the replacement.
When You Should Avoid Replacing The Valves On Your Own
Though most people can do well on their own with this project, there are times where it makes more sense to hire a professional—and not just for convenience’s sake, either. If any of the following are true, you might need to call a handyman or a plumber:
- You are physically incapable of replacing the part. This is an easy task for most people, but it’s not something that people who are mobility-impaired should attempt on their own. If you have a disability that prevents heavy arm movement or working with precision, this isn’t a task for you.
- Your shower’s setup has a unique twist to it. Showers that have highly intricate plumbing or showers that involve a non-standard setup process need to be handled by a pro. If you have more than three valves or have a twisty setup, just skip this and ask for a handyman’s help.
- The house you’re working on is more than 40 years old. Older houses are known to have strange plumbing setups and may also have other issues that need to be addressed. The older the house is, the more likely it is that you will need professional help.
- You need to knock out a wall to get to the plumbing, and you don’t know how to fix it. If you’re fairly certain that you’re going to have to remove the tiling or a wall and it won’t be a minor cut, call a professional crew to get it done. You don’t want to have to deal with rebuilding a shower wall on your own!
- Something went wrong during your replacement. Let’s say that you skimmed through the instructions, did the thing carelessly, and then your shower still won’t work, and water is pooling behind the wall. If this happens, you need to call a professional to fix your mistakes.
Do You Need a Faucet, Fixture, or Pipe Repair or Replacement?
Get free, zero-commitment quotes from pro contractors near you.
Our Final Take
At first glance, the task of replacing a shower valve can be intimidating—far more so than, say, replacing a doorknob or changing out your faucet. However, looks can be deceiving. A typical shower valve replacement job can be easy as long as you follow the steps carefully and keep an eye out for potential leaks.
Of course, there’s always going to be a caveat. If you have a shower setup that requires more work than the norm, you might want to call a professional to handle it. It’s better to be safe than sorry.

We are a team of passionate homeowners, home improvement pros, and DIY enthusiasts who enjoy sharing home improvement, housekeeping, decorating, and more with other homeowners! Whether you're looking for a step-by-step guide on fixing an appliance or the cost of installing a fence, we've here to help.
More by Upgraded Home Team


![The 10 Best Table Saws - [2022 Reviews & Buyer's Guide]](https://cdn-fastly.upgradedhome.com/media/2023/07/31/9070645/the-10-best-table-saws-2022-reviews-buyer-s-guide.jpg?size=350x220)