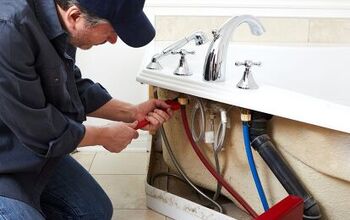
What Is The Rough-In Height For Sink Drains?

The “rough-in” building stage is when the plumbing fixtures and pipes are all lines are put in place, but they are not yet connected. Plumbing rough-ins, such as sink drains, are just one of many things inspected throughout the building or renovation process.
Staying on top of everything and getting your sink drain rough-in to the correct height can mean the difference between passing and failing an inspection. So, what is the correct rough-in height for sink drains?
A standard sink drain will be 24-28 inches from the floor. This means the rough-in height for a sink drain will need to be about 18-20 inches from the floor. This way, there’s enough room for the P-trap and hot and cold water lines to fit into place. The rough-in height will vary based on the height of your counter and depth of your sink.
Here are some things to consider when you are at the rough-in stage of plumbing in a home improvement project.
Related Content: Cost To Rough-In Plumbing For A Bathroom | Kitchen Sink Plumbing Rough-In Dimensions | How To Rough-In A Double Sink Vanity | Bathroom Sink Dimensions | Bar Sink Dimensions
Do You Need to Hire Sink Installers?
Get free, zero-commitment quotes from pro contractors near you.

Factors in Sink Drain Rough-In Height
When you are starting to rough in your sink drain, you will need to consider a few factors to get the appropriate height.
Some of the main factors are:
The Counter Height
The counter height may be the biggest factor that comes into play with the height of your sink drain rough-in. A standard kitchen counter will be 36 inches from the ground while a traditional bathroom vanity will be lower at 30-32 inches.
In rough-in plumbing for a bathroom, you don’t want your sink drain too high. This could interfere with the placement of other pipes or your sink. At the same time, if you have a shallow sink or are installing a sink in a 40” kitchen bar, your sink drain rough-in will need to be much higher than the norm.
The Size of Your Sink
Before you rough in your sink drain, you will want to make sure you are leaving room for the type of sink you wish to install. A standard sink will be 8 inches deep, however, many prefer a deeper sink, especially in the kitchen.
A deeper sink will allow you to fit more dishes and give you room to wash bigger pots and pans hassle-free. However, this decision will affect the height of your sink drain rough-in. For example, if you choose a standard counter height with a deeper sink, you may need to drop your sink drain rough-in height to 16-18” from the floor.
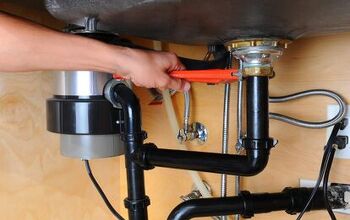
P-trap Location
To pass inspection, your sink will need to have a P-trap. The International Residential Code stipulates that the P-trap should be placed at a maximum of 24” below the sink drain. This measurement will vary depending on the height of the base of your sink from the floor. The rough-in sink drain will need to be the right height to easily connect to the P-trap.
Pipe Connections
When you are in the rough-in stage, you can decide if you want to center your pipelines or keep them off-center from your sink. Many choose not to center the pipes under the kitchen sink to leave more room for storing items.
You will want to rough in your sink drain so that it doesn’t interfere with other pipes. For example, the hot and cold water lines will need to be installed above your sink drain rough-in. These water lines are usually placed 20-22” from the floor, or a few inches above your sink drain rough-in.
Video: Roughing In A Sink
A Sink Drain Rough-In Step-by-Step
If you have plumbing experience, and the building codes in your area allow you to DIY the project, you can try your hand at a sink drain rough-in. Or, if you plan to call in a professional, it is still a good idea to know the basics steps that go into your kitchen or bathroom projects.
Here is a step-by-step for a sink drain rough-in:
Step 1: Take into consideration your sink and counter height
For the correct bathroom or kitchen sink plumbing rough in height, first, measure the height of your counter and the depth of your sink. Then measure at least 12 inches below the base of the sink to leave room for the P-trap. Mark that point on the wall stud and find where you will connect this sink drain to a sewer line.
Step 2: Install the sink drain pipe
Cut a length of 2-inch PVC pipe to match your measurements. Drill a hole into the studs and then another in the floor under the sink. Feed the drain pipe through both holes while making sure you are using at least a ¼ inch per foot downslope so your water will drain properly.
Step 3: Connect the sink drain pipe to the larger sewer pipe
Next, use a sanitary tee to connect the sink drain pipe to your main sewer pipe. Leave the smaller, top port on the T-connecter empty so you can connect it later to the vent. To prevent leaks, glue these connections in place using plastic cement.
Step 4: Vent your drain
The drain vent helps your water drain faster and removes sewer gas as well. The vent for your drain should hook into the top of your sanitary tee connector. From there, it will make a connection to the main vent stack. You will want to plan the route of your vent from the T-connector to the vent stack. Then drill holes in the studs accordingly to accommodate your vent. When the vent is connected at both ends, use plastic cement to seal the joints.
Those are the basic steps you will need to follow if you are planning to rough in a kitchen or bathroom sink drain through the wall. However, wall plumbing is not your only option. You can also check into roughing in a sink drain through the floor to decide which method is right for your project.
Rough-In Sink Drain through the Floor vs. Rough-In Sink Drain through the Wall
Drains that are on the floor are more common than you might think. This type of plumbing is often used with pedestal sinks, while wall-plumbing is common with a vanity sink. Here are some things to consider when deciding if you should rough in your sink drain through the floor or through the wall.
- Both floor plumbing and wall-plumbing require a P-trap.
- When you rough-in wall plumbing, you need to carefully avoid electrical, structural joists.
- Floor plumbing has gravity on its side, while wall plumbing needs exact slopes to drain properly.
- A wall plumbing rough-in tends to be an easier process overall.
- Floor plumbing is generally a more expensive process.
When you decide on the type of sink you want for your bathroom, you can decide which rough-in plumbing type is right for your needs.
Should I DIY a Sink Drain Rough-In or Hire a Professional?
For those with plumbing experience, you can DIY a sink drain rough-in, however, many will need the help of a professional to make sure your sink drain is set up correctly. Depending on where you live, you may need a permit and/or a licensed plumber on the job to pass inspection. It is always a good idea to check the building codes in your area before you start a home improvement project.
Here are some reasons it can be a good idea to pull in a licensed plumber for the job:
The Quality of the Materials
When you are looking for materials for your plumbing, the choices can be overwhelming as a novice. Should I go with the PVC? What size should the pipe be? How should I connect the pipes to avoid leaks? A professional will have the answers to these questions and may also have access to higher-quality materials that are not sold in your average home improvement store.
Clogged Drains and Pipes
If your pipe is installed incorrectly, it could lead to blocked drains or pipes. This can cause the water in your sink or vent to back up and may cause your sink to emit unpleasant smells.
Passing a Plumbing Rough-In Inspection
The condition of your sink drain plumbing rough-in can determine whether you pass or fail a permit inspection. The inspector will check all of the plumbing vents, P-traps, connections, sanitary tees, sink drains, and backwater valves. If any of those plumbing essentials are improperly installed or not working well, it could result in a failed inspection. This could cause significant delays in the completion of your project.
The Cost to Hire a Professional
When searching for a professional it’s wise to get three to five different quotes before making your final decision. For a job like this, you are looking at about $45 to $75 per hour for labor charges. However, the overall total will depend on the number of man-hours that go into the project as well as any additional materials you may need. Ask for a cost breakdown of what will be included in the quote to make sure you know how much to budget for your project. For a full bathroom rough-in, you can look at some of the cost breakdowns here: How Much Does it Cost to Rough-In a Bathroom?
Summing It Up
On average, the rough-in height for sink drains will be 18-20” above the floor. As we mentioned, this height can vary based on the sink size and the height of the kitchen counter or bathroom vanity. It is quite critical that you get your sink drain rough-in correct as it is a part of the plumbing inspection process during building and renovation. Once the plumbing rough-ins are approved, you will start to see your dream home improvement project come to life.
Nick Durante is a professional writer with a primary focus on home improvement. When he is not writing about home improvement or taking on projects around the house, he likes to read and create art. He is always looking towards the newest trends in home improvement.
More by Nick Durante