Do I Need A Permit To Add A Subpanel?
When dealing with electricity, it is often a question of where you live as to whether you need a permit or not. Just as with this question about installing a subpanel, it will depend on your particular state and city. It can also be dependent on the building codes in your specific community or subdivision.
You will most likely need a permit to add a subpanel to your electric panel. No matter whether you are a licensed electrician or a DIY homeowner, you will likely need a permit to get the work to pass inspection. In almost all states, you will need a permit to do any kind of major electrical work.
Adding a subpanel may not seem like a big deal to you if you are a DIYer or someone who knows a lot about electrical work. However, whenever you do something that deals with your home’s electrical system, you usually need a permit. You should also meet with an inspector or electrician to determine whether you have enough power to add a subpanel.
Do You Need to Hire an Electrician?
Get free, zero-commitment quotes from pro electricians near you.

12 Steps For Adding a Subpanel
As with any type of project, there are steps to take to get the best results. You should go over the steps carefully before starting any job, no matter how big or small it is.
Step One: Talking to a Professional
You will always need to talk to a professional before doing any type of electrical work on your home. Even if you are a licensed electrician, you will need to check the local building codes and get a permit. A licensed inspector can tell you if you can add one, how many amps you can add, and will want to take a look at the subpanel after you install it.
Step Two: Purchasing the Subpanel and Other Parts
Going by what your inspector or electrician tells you, buy a subpanel with all of the breakers, cables, and connectors with it. You have to make sure they are all compatible, so it is best to get it all together as a set. The parts you should get with your subpanel include:
- A four-wire feeder cable
- Feeder breaker
- Connectors
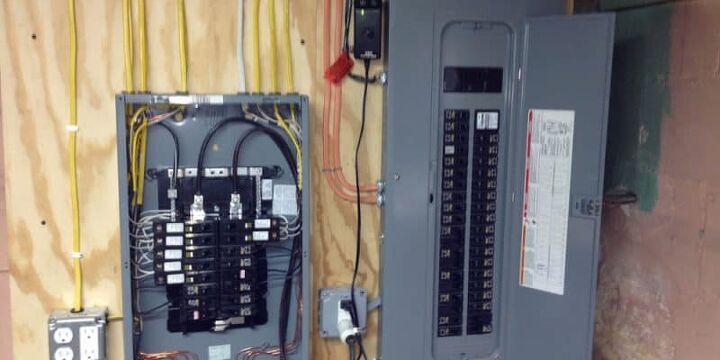
Step Three: Placing the Subpanel
If you are adding circuits to power more electrical devices, you should install it next to the main circuit breaker. That way you can use it when you need it and shut the power off to the subpanel when you do not need it. The subpanel should be placed about a foot from the main panel. If your extra electric is in a garage or basement, you can run a longer cable to the new subpanel.
Quick Tip: Never place a subpanel in a closet or bathroom. They have electricity running through them, so it is essential that they not overheat or get wet.
Step Four: Turn Off the Main Power
Always turn off the main power before working with any kind of electricity. Look for the main breaker or power switch and push it. All of your lights and electrical devices should shut off when you do this. But test your lights to be sure. You can use a portable lamp or light to work.
Step Five: Find the Wall Stud and Mark The Holes
Use a stud finder to find the stud nearest to the breaker box where you need to install the subpanel. If you do not have a stud finder, knock on the wall until you find the solid sound where the stud is located.
Make a template to mark the spots on the wall where you will be mounting the panel. Use a pencil to mark the spots for the mounting screws. It should be at least five feet from the floor to keep it from children and pets.
Important: Check the building code to see if there is a specific height that you have to hang the subpanel.
Step Six: Drill the Mounting Screw Holes
Use a drill or screwdriver to install the mounting screws that came with the subpanel. Do not drive them all the way into the wall. Leave about ¼-inch between the screw and the wall so you can fit the subpanel onto them.
Step Seven: Hang the Subpanel
Slide the subpanel onto the screws and make sure they are flush with the wall. Tighten all the screws down with the drill or screwdriver. Shake it a bit to make sure it is not loose.
Step Eight: Knock Out the Slug
There is a perforated circle called the knockout slug either on the top, side, or bottom of the subpanel. Use a hammer and screwdriver to knock out one of these holes to insert the wiring through.
Step Nine: Inserting the Connector
Put the metal connector in the hole where you will insert your four-wire feeder cable. Use the drill or screwdriver to tighten the screws onto the top of the connector to hold it in place. They do not have to be in the wall stud. Screw the retaining nut to the bottom of the connector.
Step Ten: Run the Cable
Run the four-wire feeder cable that came with the subpanel through the opening. Unwrap the insulation to expose the four wires inside. Use your fingers so you do not damage the insulation on the wires inside.
Important Tip: There should be a bare metal wire, white wire, red wire, and black wire inside the four-wire feeder cable.
Step Eleven: Connect the Ground and Neutral to the Bus Bars
The white wire should be inserted beneath the screw at the top of the neutral bus bar in the main panel. Tighten the screw to secure it in place. Connect the other end of this wire to the subpanel in the same way. Do the same with the ground wire (the bare wire).
Step Thirteen: Connect the Other Two Wires
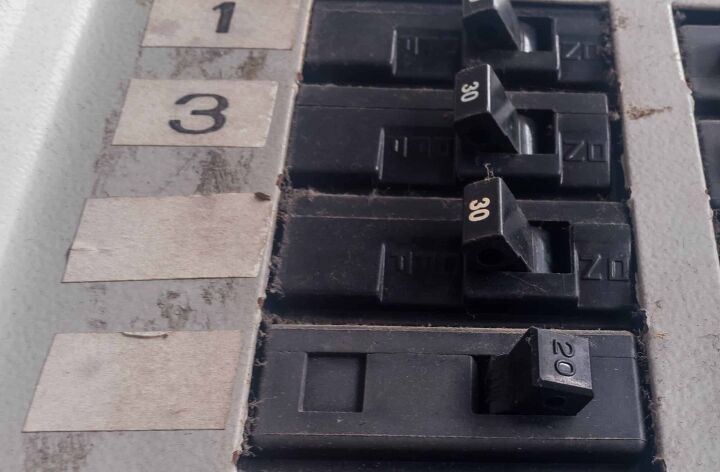
Use a wire stripper to remove about ¼-inch of the insulation on the red and black wires. Insert these wires to the two screws at the top of the feeder breaker. The feeder breaker is the black cube with switches on it that came with your subpanel. It is used to run the power from the main panel to the subpanel.
Step Twelve: Placing the Feeder Breaker
Snap the feeder breaker into an empty slot in the main panel. It will click into place as long as you have fitted it correctly. Run those two hot wires from the feeder breaker into the two spots in the bus bars that do not have the neutral or ground wires connected to them.
Related Questions
Why Would I Need a Subpanel?
There are many reasons why you may want to add a subpanel to your original electrical panel. Although subpanels are not mandatory in homes, they do add more space and electrical wattage if it is needed. You may need more power if you:
- Blow fuses or breakers often
- Use your basement for entertainment or a bedroom
- Are adding another bedroom
- Add another room that needs more electricity
Do You Need to Hire an Electrician? Get free, zero-commitment quotes from pro electricians near you: FIND LOCAL PRO ELECTRICIANS. Does My Subpanel Have to be Inspected?
It is always a good idea to have your work checked by a licensed inspector or electrician. In most states and jurisdictions, it is mandatory. However, even if it is not a law, you should check your work anyway. Even licensed professionals have to have their work inspected because nobody is perfect.

I am a DIYer who loves writing about anything home-related. When I am not writing, you can find me studying for my PhD in Psychology, photographing nature, and swimming at the lake with my grandkids.
More by Patricia Oelze