


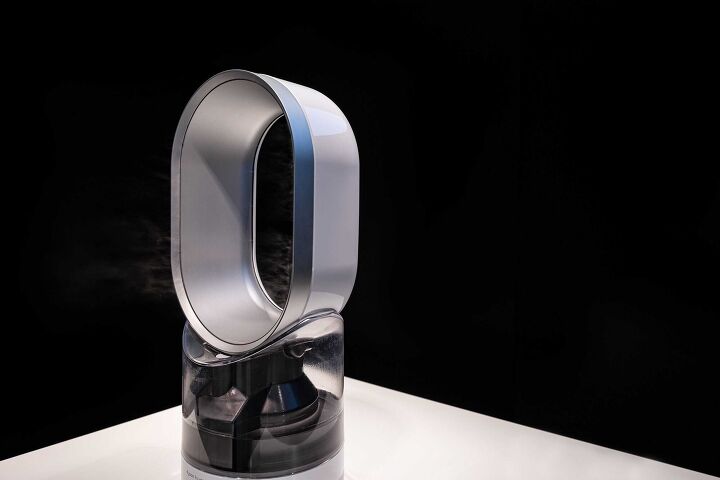
How To Clean A Dyson Humidifier (Step-by-Step Guide)
When living in dryer climates, a humidifier can really come in handy. Dry air is much different than living in humidity and can have noticeable impacts on your skin in particular. Dry skin, breathing problems, and cracked lips are just a few of the things that overly dry air can cause.
So, picking up a Dyson humidifier only makes sense. But how do you keep that thing clean? Here is a step-by-step guide for cleaning your Dyson humidifier so that it can run optimally going forward and you can spend less time maintaining it.
Do You Need Central Humidifier Installation or Replacement?
Get free, zero-commitment quotes from pro contractors near you.

Why Does the Humidifier Need Cleaning?
The main thing with the Dyson humidifier is that it has to be cleaned on a fairly regular basis. This is because if it isn’t cleaned often (and properly), it can cause serious issues with the unit itself. All of the mold, dirt, and grime that it picks up can cause the internal components to break down and lose efficiency.
Having said that, it’s a good idea to clean the humidifier at least once per month. This should be enough to keep the Dyson humidifier working optimally on a regular basis, though your unit may need a little greater frequency of cleaning depending on your own unique conditions. The amount of use will also dictate just how much you need to use it.
Video: How To Clean The Dyson Humidifier
Step 1: Remove the Tank
The very first thing that you need to do when cleaning the Dyson humidifier is to remove the tank. Wipe away any remaining or excess water that may be at the very bottom of the tank as well. You don’t want water festering in the tank for any longer than necessary.
When you’ve wiped the tank clean, it is time to unscrew the plug from your water tank and empty out any remaining water that is sitting in the tank. It’s easiest to just tip it upside down in a utility sink and let gravity do the work for you.
Step 2: Remove the Chimney
The next step is to remove the chimney from the water tank. The best way to do this is by twisting the dial of the chimney 90 degrees clockwise. This should effectively loosen the chimney so that you can lift it out all the way.
When you’ve successfully removed the chimney, you will need to remove the seal as well. To get it out, simply pinch the tabs together using one and lift it straight up. It may seem awkward at first but should take no more than 30 seconds to a minute to do.
Step 3: Drain the Water
As you will learn by taking apart your Dyson humidifier, water can and will get everywhere. In this step, we will need to drain the water out of the water trough. To do this, you will need to first remove the seal for the water trough.
When removing any of these parts, it is important to note that you do not need to force it. If it is having a difficult time coming out, there’s a good chance that you aren’t taking the proper steps to loosen it. Pulling hard on part of your Dyson humidifier is the fastest way to having a broken part on your hands.
Step 4: Citric Acid Solution
In order to clean your Dyson humidifier, you will need a cleaning solution. You can create a citric acid solution by mixing in 30 grams of powdered citric acid for every liter of water that you use. The bigger the job, the more you’d want to use.
Be sure that you mix your citric acid solution well. When it’s ready to go, take the solution and use it to fill up the water trough until the UV-C emitter and the piezo are completely covered. Using the remaining solution, put the seal, water chimney, and trough seal and wait about 15 minutes before you remove them from the solution.
Step 5: Empty and Rinse
After giving all of the components of the Dyson humidifier a chance to soak and clean thoroughly, it is time to rinse that solution off. You can use cold water from the tap if that is easier for you, just ensure that the water is cold.
When you’ve successfully rinsed off all of the solution, wipe everything down using soft, dry cloth. Make sure that each of the components has been completely dried before moving on to the next step.
Step 6: Remove the Surround
In this step, you’ll need to remove the surround from the amp assembly. To do this, all you have to do is pull the bottom of the surround outwards and then lift. Use a cloth that has been soaked in your citric acid solution, make sure to ring it out, and then use it to wipe the edges of the upper assembly and the amp completely.
When you’ve finished wiping down those components, move on to the amp assembly surround. You may have to resoak your rag once or twice to ensure proper coverage, but it should result in totally clean components ready to be returned into the unit.
Step 7: Cleaning the Water Tank
With whatever of your citric acid solution you have left, pour it into the water tank. Make sure to replace the water tang plug so that your citric acid solution won’t be able to leak out. After you have dumped what’s left into the tank, shake it about for around 30 seconds.
The shaking is meant to dissolve or loosen any particles left over in the tank and get the inside as clean as it can be. Allow the tank to sit upright with the solution inside of it, giving the process around 15 or 20 minutes so that the citric acid can properly break the dirt down.
Step 8: Filling the Tank and Reassembling
The final step is to empty any of the citric acid solution leftover out of the tank and fill it to about the halfway point with cold water. Give it a good shake for about 30 seconds or so to rinse off any of the citric acid solution from the inside of the tank before draining the cold water.
With all of the components completely clean, you are now ready to reassemble the Dyson humidifier the exact same way that you took it apart.
Do Dyson Humidifiers Have Filters
No matter what Dyson humidifier that you choose, it will require a filter. This is to ensure that the air is cleaned properly. It also means that after a couple of months, you’ll need to purchase a replacement filter.
Thankfully, you can find replacement filters not only through Dyson but at a number of online retailers as well. Keeping your humidifier filter clean is important. Without a properly functioning filter, the humidifier may have a more difficult time filtering out the pollutants in the air, especially when the climate is hot.
Do You Need Central Humidifier Installation or Replacement?
Get free, zero-commitment quotes from pro contractors near you.
Where to Place the Humidifier?
The best places to put your Dyson humidifier are on the floor, in a corner, and about 3 feet away from the walls. This is according to the manufacturer itself. You can fiddle around with it from there to find your preferred setup.
Related Guide

Ryan Womeldorf has more than a decade of experience writing. He loves to blog about construction, plumbing, and other home topics. Ryan also loves hockey and a lifelong Buffalo sports fan.
More by Ryan Womeldorf


![Cost To Drill A Well [Pricing Per Foot & Cost By State]](https://cdn-fastly.upgradedhome.com/media/2023/07/31/9074980/cost-to-drill-a-well-pricing-per-foot-cost-by-state.jpg?size=350x220)


![How To Reset A Whirlpool Cabrio Washer [In 5 Easy Steps!]](https://cdn-fastly.upgradedhome.com/media/2023/07/31/9076531/how-to-reset-a-whirlpool-cabrio-washer-in-5-easy-steps.jpg?size=350x220)