How To Move A Thermostat Without Rewiring

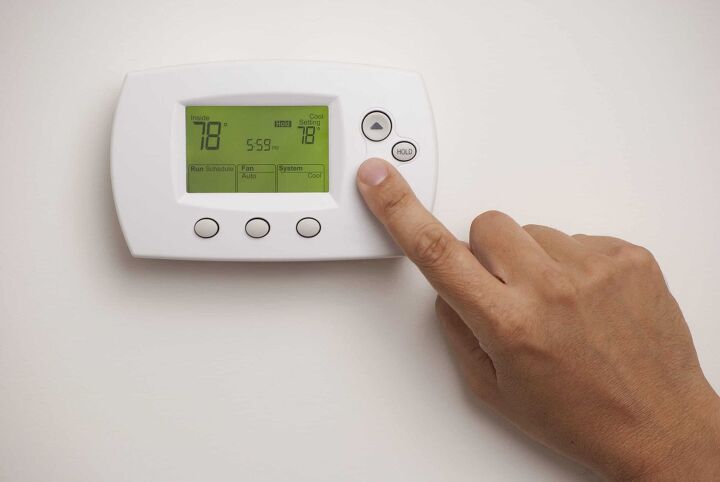
Sometimes, there are things in a house that just don’t quite feel right. If your thermostat is on a wall that isn’t convenient or is in the way, there is a way to move it easily. If you want to move it to an adjacent wall, you can do so without even doing any rewiring.
To move a thermostat without rewiring, remove the interface from the panel and disconnect the wires. Then, drill a new hole where you want to move it. Run the wires to the new hole with a wire fishing tool, then reconnect and mount the interface.
This is the easiest way to move your thermostat and can be done in less than an hour. It is one of the easier thermostat problems to fix. In this article, we will go through the process step-by-step to try and make it as easy as possible.
Do You Need Thermostat Installation or Replacement Services?
Get free, zero-commitment quotes from Thermostat Technicians near you.

Before You Begin
Before starting, you should make sure that any and all power is off in the room you are working in. This will ensure that you stay safe during the entire job. Although the wires going to the thermostat are not high-voltage, there are others in the wall. It is better to be safe.
To turn off the power to the room you are in, use the circuit breaker box. Most breaker boxes are labeled with which switch controls which room. If not, plug in a light in the room you are working in and see which switch turns it off. Keep that breaker switch off for the whole job.
For an extra layer of safety, wear gloves when moving your thermostat. These will not only protect your hands from any sharp edges but also electrical current. Just in case, having that extra protection will give you more confidence.
How To Move A Thermostat
Step 1: Pick Where You Want to Move It
Deciding where to move the thermostat is a key part of the process. Think about why you want to move it in the first place. Make sure that you aren’t just moving it somewhere where it will be in the way of something else.
The ideal place for a thermostat is an interior wall that is not exposed to anything extreme. Keep it out of the way of any excess sunlight or heat sources. These can damage the display and even render the thermostat useless if exposed for too long.
It is easiest to move a thermostat to a wall that is adjacent to where it is already installed. Usually, an adjacent wall will be far enough away to solve any issues you are having with the placement. By keeping it fairly close, though, you won’t have to add any extensions to the wire.
Step 2: Take The Interface Off The Back Panel
The interface should attach to the back panel with a series of snaps and clips. These are usually located on the top and bottom of the interface housing. You can push the tabs in, which will release the interface from the mounting plate.
As you pull the interface away from the wall, disconnect the wires that are attached to it from the hole. Don’t let these wires fall back into the hole once they are disconnected. Use masking tape to fix them in place for the time being.
Put the interface somewhere that it will not get dirty or dusty from the work being done. Some of them are extremely sensitive and can’t withstand much shock. Place it somewhere it won’t be too disturbed.
Step 3: Drill A New Hole
Once you have the interface removed, you can drill a new hole where you want to mount the new plate. Make sure that you have measured exactly where you want it to go. You don’t want to spend all day spackling holes that you didn’t mean to drill.
Using a stud finder, make sure that you are drilling into an empty pocket in the drywall. Then, using a hole saw, drill a hole that is 1-1½ inches in diameter. This will be enough room to get the wiring through and connected to the interface.
After you have drilled the hole, take some high-grit sandpaper and smooth out the edges. This will ensure that the mounting plate will be flush with the wall.
Step 4: Mount The Back Panel
Once the hole is drilled, mount the new backplate to the wall. This is usually done by screwing into the drywall on each corner of the plate. Make sure that it is level and even with the wall trim on every side.
Depending on your drywall, you may need to mount the plate with special drywall screws. These usually have plastic anchors that expand in the hole. These will ensure that the drywall doesn’t crumble where the screws are holding onto the wall.
Once you have mounted the panel, you are ready to fish the wires from the other hole. This will require the most finesse and skill out of any of the other steps.
Step 5: Hook Up The Interface
To get the interface wires over to the new hole, you will need a wire fishing tool. These are usually hooks on long, rigid cables that can be run through the walls. They are very effective and can be used to pull wire across long lengths of wall.
Run the wire fishing tool along the wall from the new hole to the old one. The rigid cable will make its way through the framing so it can be hooked onto the wires. Once they are hooked on, use the tool to pull the wires over to the new hole. There should be enough slack to do this.
Once you have the wire ends through the new hole, hook them back up to the interface. It is very important that you do this correctly. Hooking the wires up on the wrong terminals could cause the thermostat to not work or even break.
Step 6: Reattach The Interface and Fill The Previous Holes
Snap the interface back on the mounting plate after running the excess wires back into the wall. Turn it on to test it and run it a few times, heating up or cooling down the house. This will ensure that it has been hooked up correctly.
With a spackle that matches your wall, fill the old hole that the thermostat wires were previously run through. After it has dried, you can repaint it to match the finish on the wall. No one will be the wiser that it has even been moved.
Do You Need Thermostat Installation or Replacement Services?
Get free, zero-commitment quotes from Thermostat Technicians near you.

Related Questions
Anywhere that is readily accessible is a good place for a thermostat. As long as it is not in the way and won’t get accidentally bumped or turned on. It’s also important that it not be in direct heat or sunlight as this can affect the display and function.
What is the life expectancy of a thermostat?A thermostat that has been well maintained and kept out of direct sunlight can last 10 years. As long as it is not subjected to abuse or shocks, it should give you at least a decade of use.
Can a faulty thermostat cause a high electric bill?A faulty thermostat can cause all kinds of problems including a high electric bill. A thermostat that displays the wrong temperature could lead to overheating. It could also give you a faulty reading and turn on when it is not supposed to.
Related Guide

I am a writer and editor from The Bay Area, CA. When I'm not typing, I enjoy hiking, woodworking and gardening. I love sharing tips and discovering new trends in home improvement.
More by Michael Oconnor




![How Much Weight Can a 4×4 Support Horizontally? [It Depends!]](https://cdn-fastly.upgradedhome.com/media/2023/07/31/9070333/how-much-weight-can-a-44-support-horizontally-it-depends.jpg?size=350x220)
![10 Best Cordless Leaf Blowers – [2022 Reviews & Ultimate Guide]](https://cdn-fastly.upgradedhome.com/media/2023/07/31/9070789/10-best-cordless-leaf-blowers-2022-reviews-ultimate-guide.jpg?size=350x220)





![How To Reset A Whirlpool Cabrio Washer [In 5 Easy Steps!]](https://cdn-fastly.upgradedhome.com/media/2023/07/31/9076531/how-to-reset-a-whirlpool-cabrio-washer-in-5-easy-steps.jpg?size=350x220)

